- Tutorials
- Assigning a fingerprint to an employee
# Assigning a fingerprint to an employee
One of the options for recording attendance is by scanning a fingerprint.
Warning
At this point, it is assumed that the employee is already enrolled in attendance - he has an assigned personal number.
Steps to be taken:
- Employee registration in the webPatrol module
- Creating a template for a given attendance reader and loading a fingerprint
# 1. Employee registration in the webPatrol module
The webPatrol module is a separate application from attendance itself, so in order to have access to employees, we have to register them

- Open the webPatrol module and enter Users
- Go to the Unregistered in Patrol tab - new employees are located here
- Mark the employee and click the
Register usersbutton - Click the
Yesbutton to confirm PIN = Personal Number
Note
The PIN is the identifier under which the employee appears in the attendance reader
- Now the employee is in the Registered in Patrol tab
# 2. Creating a template for a given attendance reader and loading a fingerprint
The template is the record of the employee on the attendance reader. Each type of attendance reader uses a different type of template.
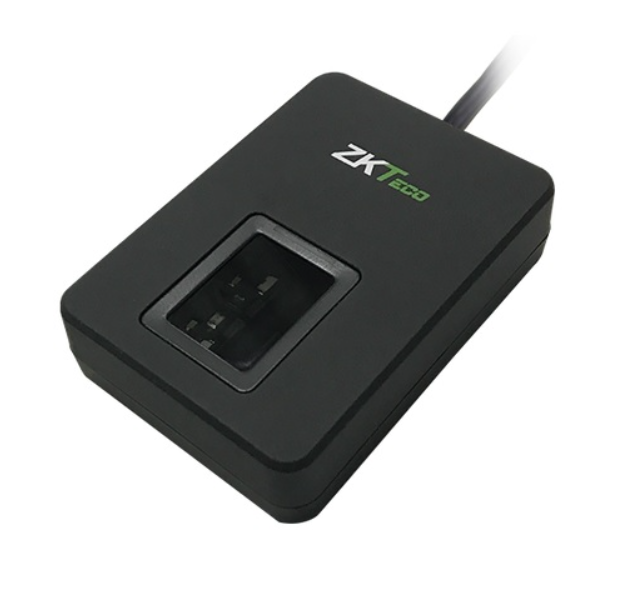
Plug the fingerprint identification reader into the USB port on your computer.
Important
Install the impersonation reader in cooperation with the software consultant of APIS, spol. s r.o.
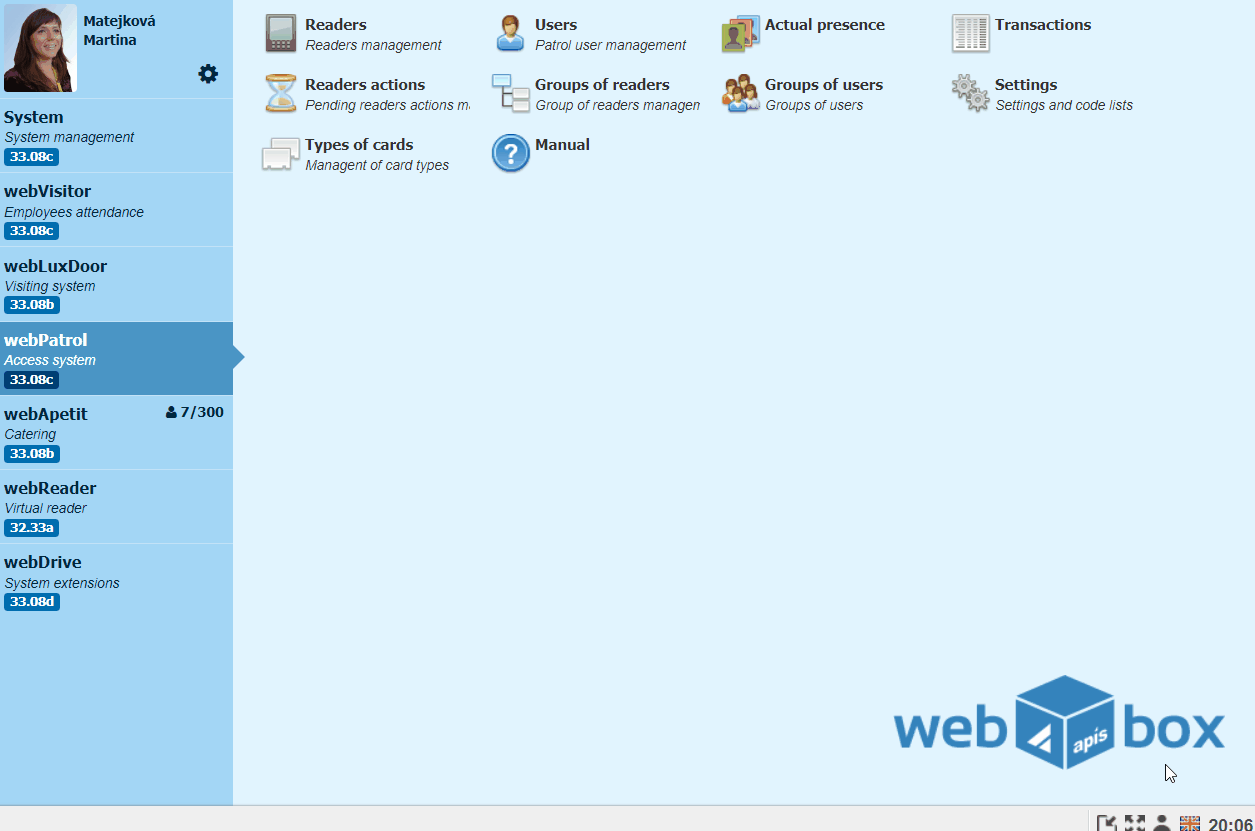
- In the webPatrol module, go to Users and the tab Registered in Patrol
- Search and
double-clickto open the employee record - Go to the Templates tab and click on the
New recordbutton - On the screen, select the type of templateAPIS reader and enable Fingerprints
Note
APIS reader - ZPAD+, Biopad
ZK - SCR100, Proface, Speedface
You can also combine the fingerprint pattern with cards.
- Continue by clicking on the
green →button - Select the privileges of the employee on the reader
Note
User - an ordinary employee who is scanned on the attendance reader. Administrator - an employee authorized to enter the menu and configure the attendance reader
- Continue by clicking on the
green →button - In the Fingerprints tab, mark the finger you want to load and click on the
Load fingerbutton - You will 3x be asked to attach your finger
Note
You gradually place your finger on the slide on the personalized reader. We try to make the belly of the finger in the center of the slide. Do not press hard on the slide, but do not touch it very gently either.
Damaged, dry, cold fingers can affect the loading of the template. If you can't get a fingerprint, try another finger. We recommend that each employee take two fingerprints.
- After successfully reading the fingerprint, click on the
Savebutton and close the window with a cross - Go to the Readers tab
Note
Readers are displayed according to the group assigned to the employee.
- Select the attendance readers and click the
Synchronize changedbutton. - After successful synchronization,
Synchronizedis displayed for the given reader
Note
The reader window is automatically refreshed in short time intervals. You can perform an immediate recovery by clicking on the Readers tab.
The assigned fingerprint is on the attendance reader and the employee can start registering for attendance.